Subscribe To Our NewsLetter
Share This Post:
What exactly is Solr search?
Search api Solr is an open platform that provides balanced queries and distributed indexing. It was built fast by the CNET, but later on, it was given to the party foundation. When Apache solr is integrated, Drupal provides an amazing experience. Many big companies such as Instagram, Twitter, and Netflix use Search api Solr Apache as a first choice.
What are the features of utilizing Search API Solr Apache?
Many e-commerce websites, such as Instagram Contractor and Netflix, use Search API Solr to get fast search results. Apart from this, there are many features of using Apache Solr. A few of them are listed below:
- Faceted navigation
- Spell suggestion
- Auto completing
- Complete text search
- Related searches
- Various recommendations
- Customer document ranking
Snippet generation Now the question arises of why there is a need to use SOLR.
It has great control over the website search fast indexing in which the index is optimized and merged. Replication, distributed, and caching search is provided.
How to implement search api solr Apache in Drupal?
The use of integrating search api solr Apache and Drupal is completed in the steps given below:
- Installation of Drupal Module
- Installation of Apache Solr
- Configure both modules together
- Create a web search page
1. Installation of Drupal module
Drupal is an open search source that provides a search API that can be used to integrate Apache Solr with the Drupal platform. The Search API module integrates Drupal with the Apache Solr search platform and provides a Solr backend for the Search API Module. Install the Search API Module in your site using Composer using the below command.
composer require 'drupal/search_api_solr:^4.2'
Go to Extend -> filter(Search Api Solr) -> install it.
2. Installation of search API solr Apache
The first thing to do is to download Apache Solr. The Solr Apache depends on Java, so to install this Apache, you must install java first. People who haven’t used Java earlier might need to install it first in their system using some coding.
After that, verify the Java version installed to activate it. Apart from this, if you want to download Apache Solr, you can get it from their official website. After the installation is completed, extract Apache Solr files and start the installation process. After completing all these steps, Solr will be downloaded into the system.
If you wish to stop the services of Solr, then you need to use different commands such as stop, start, and many similar commands. After that, open the application to see if it is running properly. For this purpose, various commands are used, which will allow you to see if the Solr is working properly.
Here are the steps: I- You can download the latest Search api Solr Apache version from its official site.
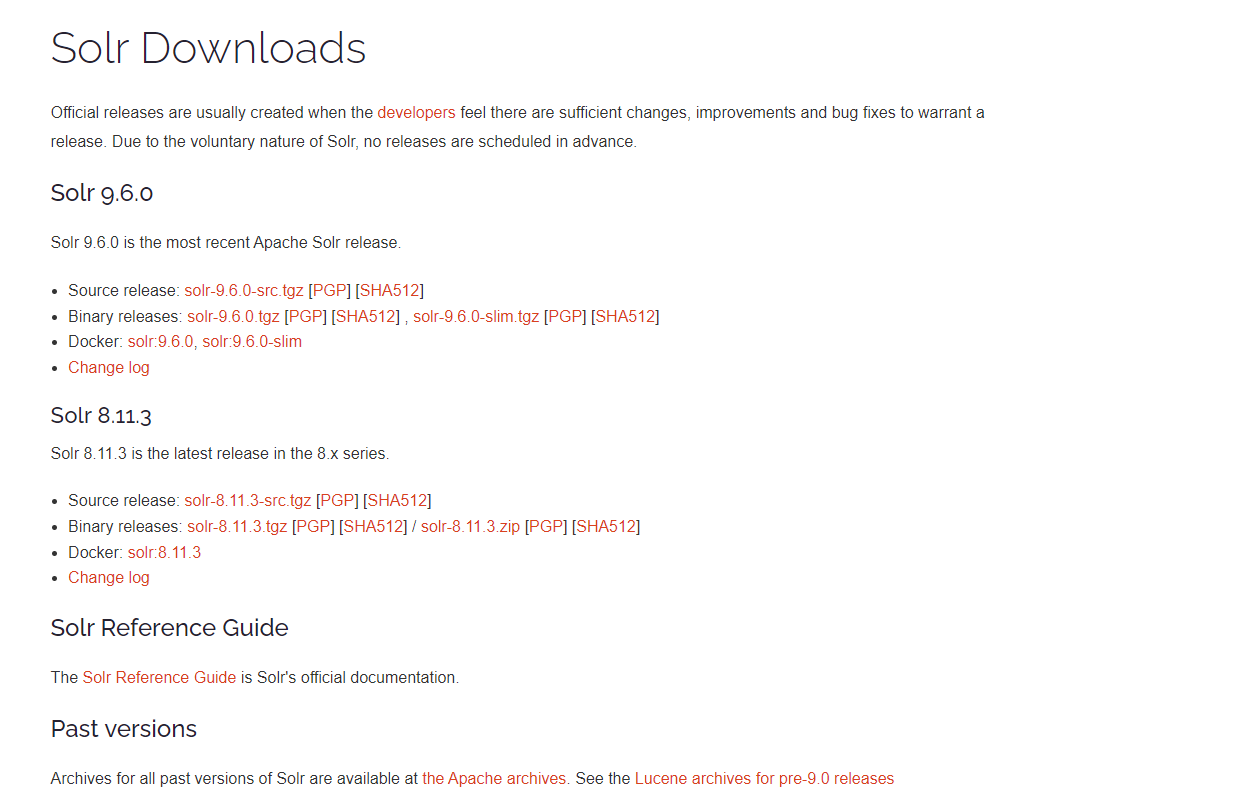
Download the solr-8.11.2 tgz[PGP][SHA512] file.
II- Now, Extract the Solr Apache file and copy to the laragon\www file.
III- Now Solr should be installed on your system. You can use these commands to start, stop and check the status of Solr service.
Solr star.
Solr stop -p (port number).
Solr status.

Default Solr runs on port 8983. You can access your Solr admin panel by typing localhost:8983 in your browser.
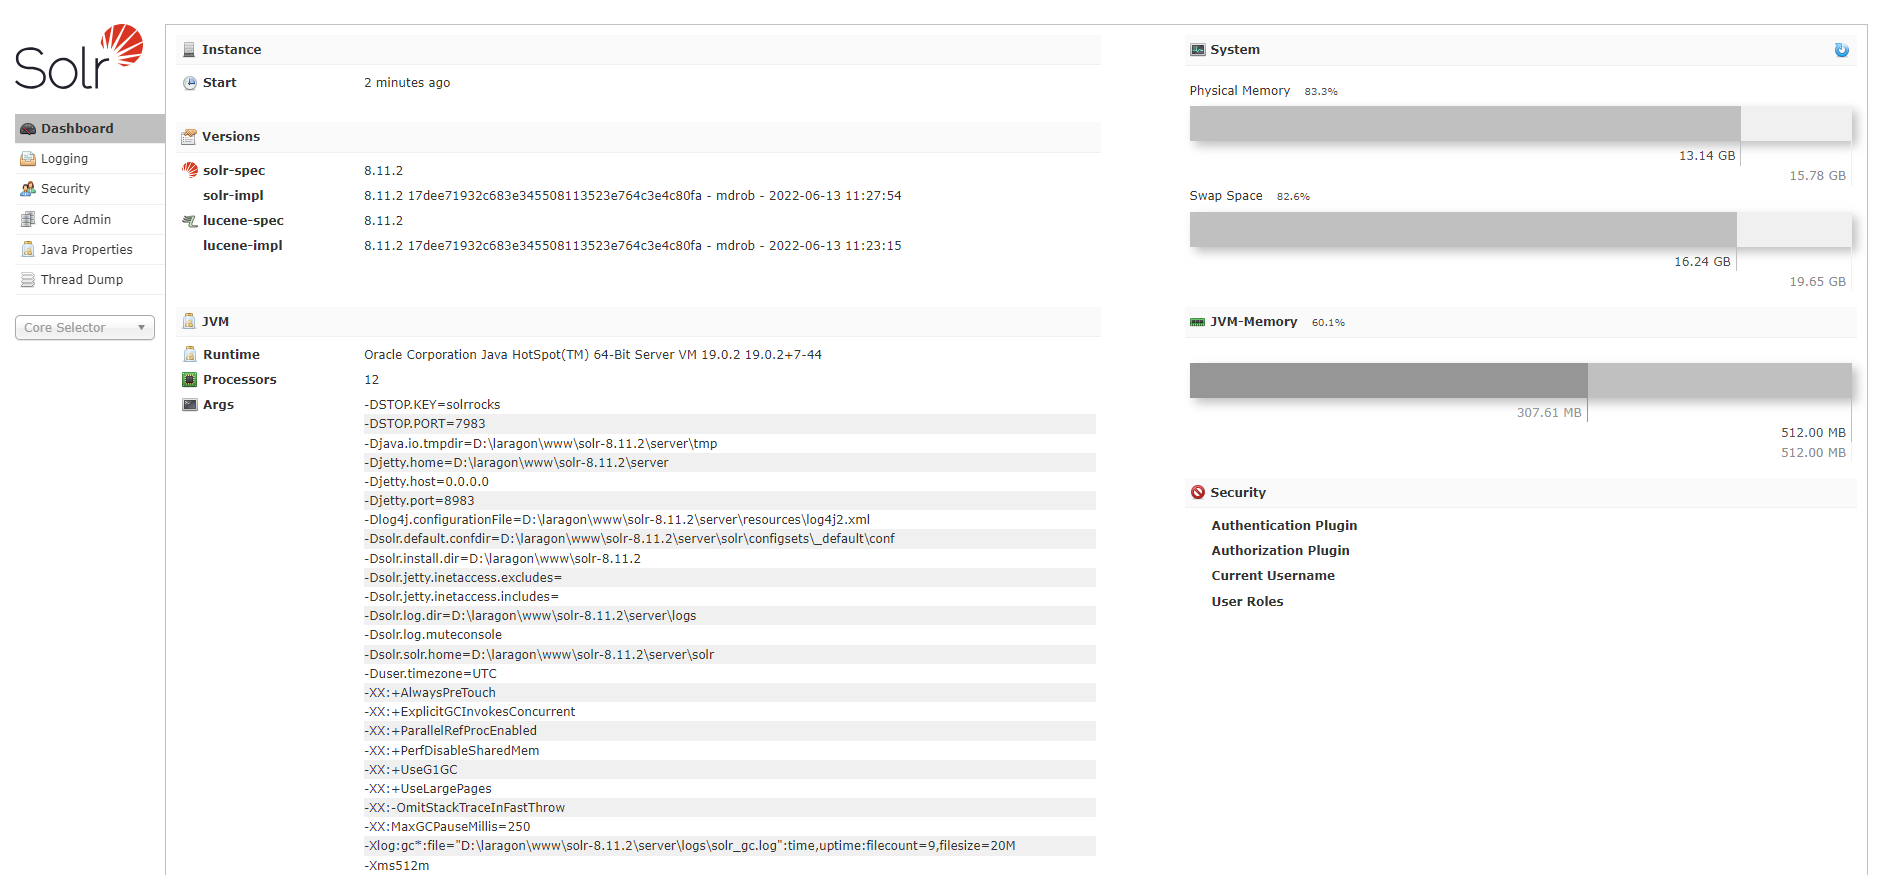
3. Configure the Drupal Module with the Apache Solr
The next track is the configuration of the Solr Apache and Drupal modules. Here are some easy steps you can follow to Configure the Drupal Module with the Solr Apache After Installation of the Solr, you need to create a core in the Solr.
Create the core using the command You can create core using the solr create core command this command has the following option:
-c core_name Name of the core you wanted to create.
-p port_name Port at which you want to create the core.
-d conf_dir Configuration directory of the port.
You can use laragon\www\solr-8.11.2\bin>solr create -c MySolr creating core.

This command will differ depending on where Solr is installed.
You can see the created core in the Solr Admin panel

4. Set up the Search Index/Create a Solr Server & Index
After the Drupal 8/9 and Apache configuration, you need to understand the use of Search API. For this, search for the configuration and go to metadata. After that, look for the API, and there you will find the option to Add an index.
Before this, you can follow the sequence of these steps:
Index name: The first thing to do is add an Index name according to your choice. Apart from this, you can also use multiple indexes. In it, you can add multiple entities, such as users and comments.1- Add Server
1. Go to Configuration > Search and MetaData > Search API > Click on Add server
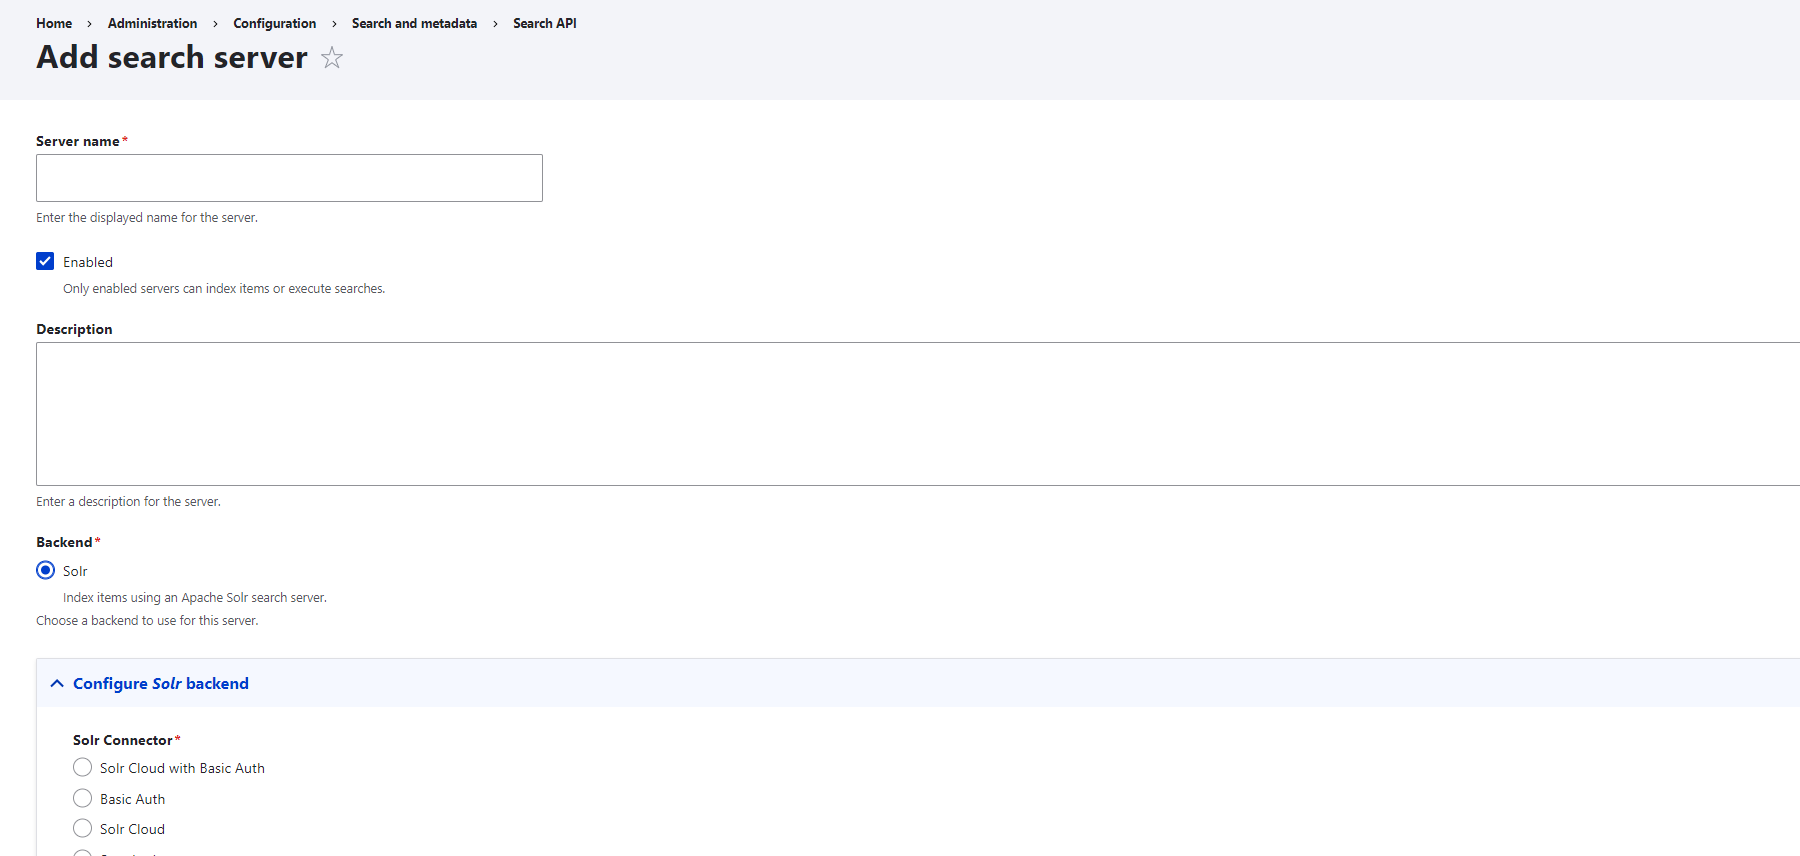
2. When you click on the Add server, you will get the form you need to fill that form.
I- Server Name: Enter the Server name
II- Enable: check the enable checkbox. If you don’t enable it, you can’t index the item
III - Description: A brief description of the server
IV - Backend: choose your backend

3. Next, you need to configure the Solr backend. Click on the Configure Solr backend.
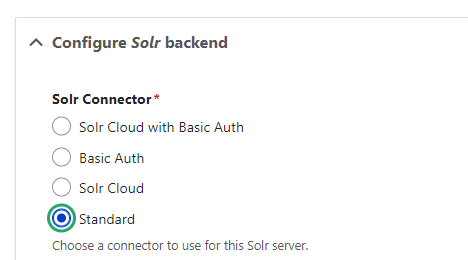
4. When you click on the standard, you will get the form you need to fill the form.

HTTP protocol - HTTP
Solr Host- localhost
Solr port- 8983
Solr path- /
Solr core - MySolr
5. Add Index
Go to Configuration > Search and MetaData > Search API > Click on Add Index.
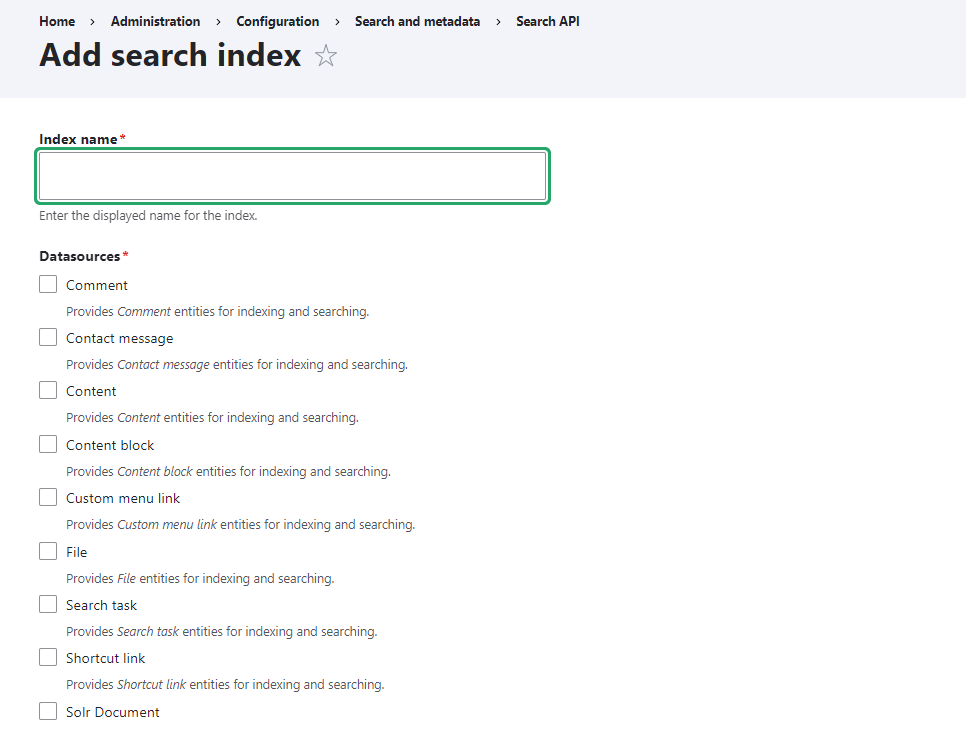
Index Name: Enter an index name
6.Here you need to select the Data Sources to index the item for the search functionality.
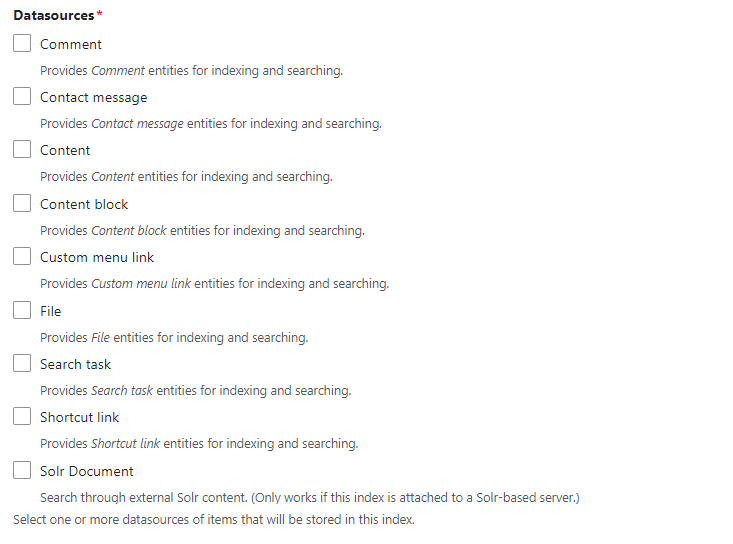
Select bundles according to your needs.

7. Select the server to index the items

8. Click the save and add field button
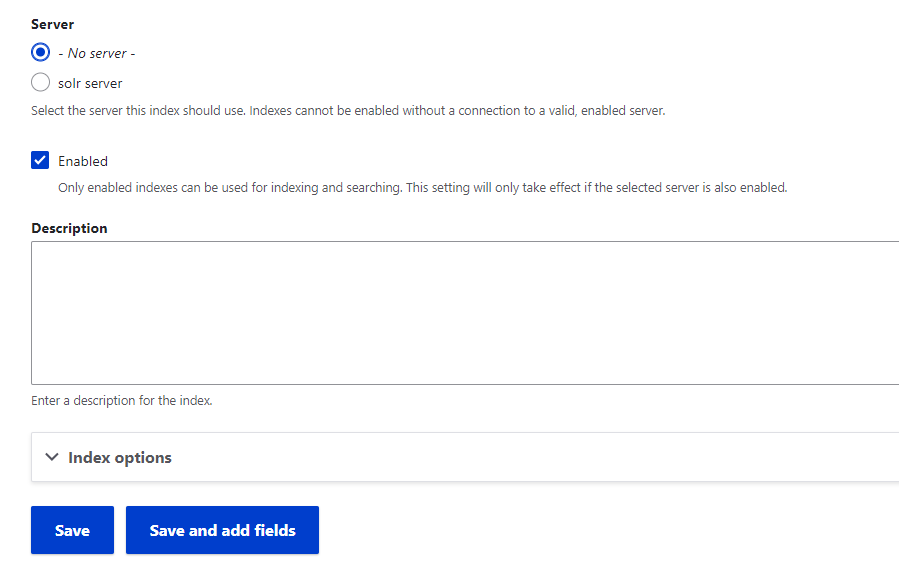
9. Click on the Add Field
10. You need to add a field you need
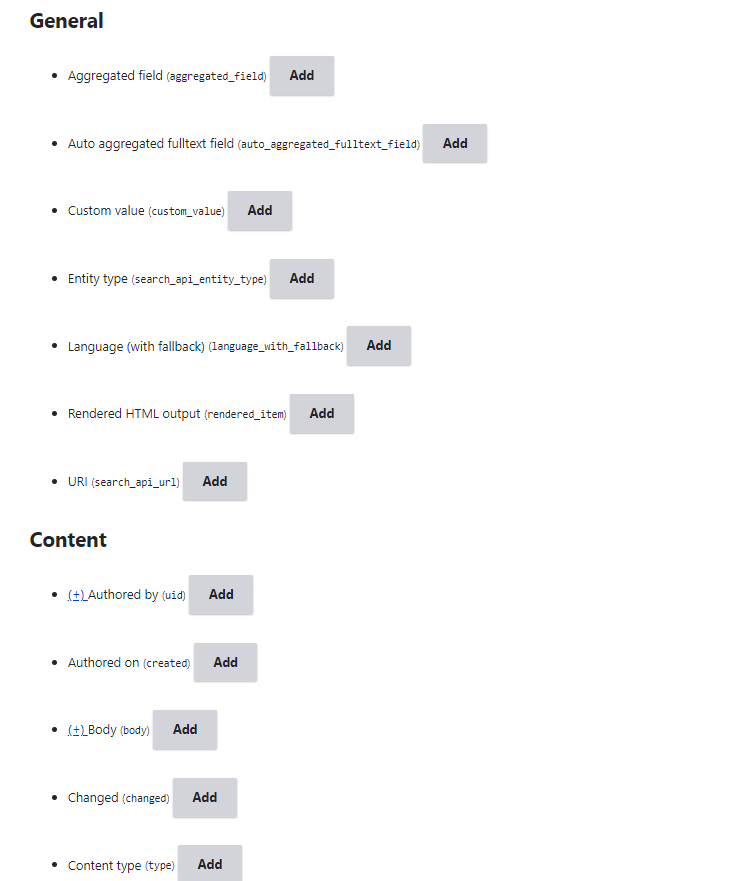
11. After adding the field, click on done then save.
12. Now the Index and Server are created on the website.
13. After this download the config files from the server on the website.
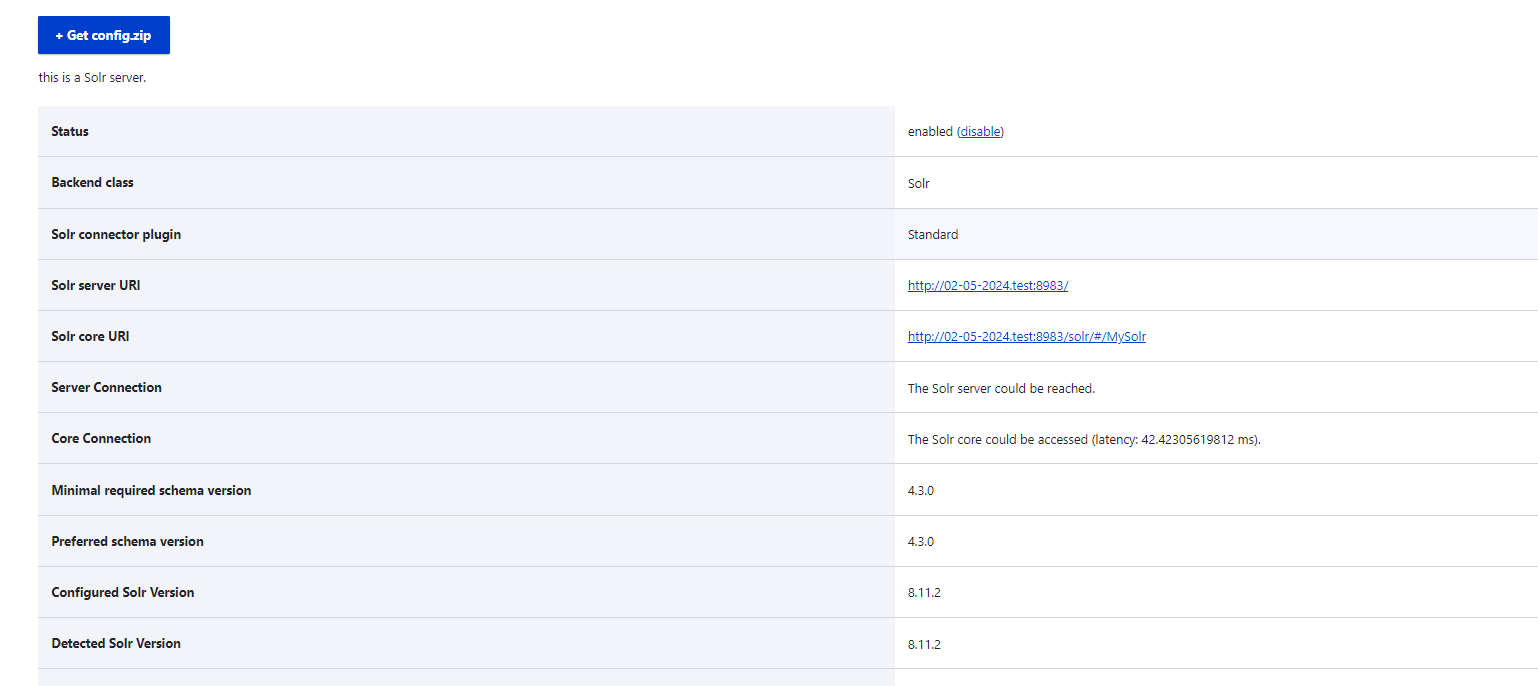
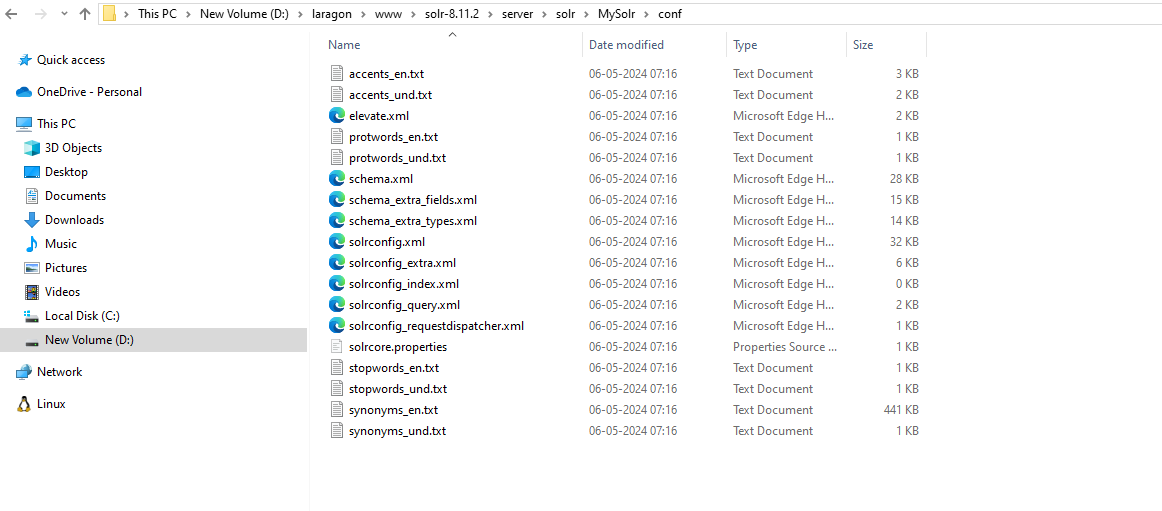
14. Extract the Config.zip file and copy on the conf file to the solr core
Error: If you have a 0/0 indexing problem and
solr core name: no information available.
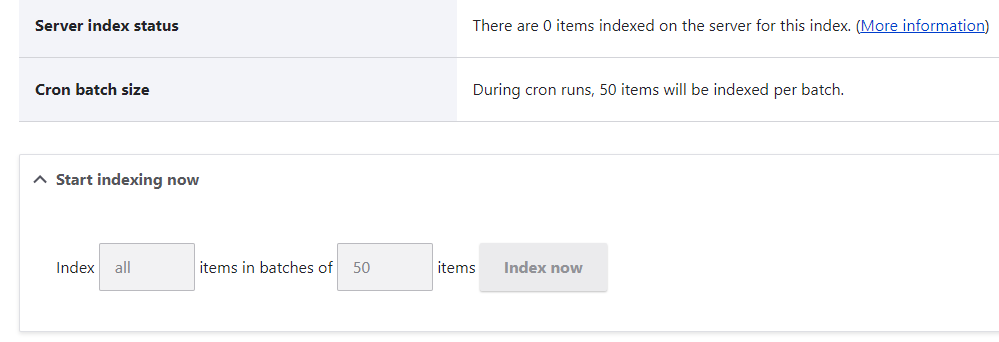
You need to create another core in the Solr admin panel using cmd.
15. Add a new server add a new index and index file then download the get config.zip file and copy on conf file to solr core
16. Go to Configuration -> Search and Metadata -> Search API and click on the index that you have created.
17. Click the Index Now button.


18. Now all the contents are indexed in the Solr core.
5. Create a Search Page/ view for the index
Lastly, you need to create a search page. To create the search page, look for the API module to help create fast, customized, and simple search pages.
For this, search for the configuration and go to metadata. After that, look for the API, and there you will find the option of Add Search page.
Confusing? Follow these steps:
You can create a view of the Solr index and add the indexed fields to the view to get the results from the Drupal 9 Solr.
1. Go to Structure > view > add view
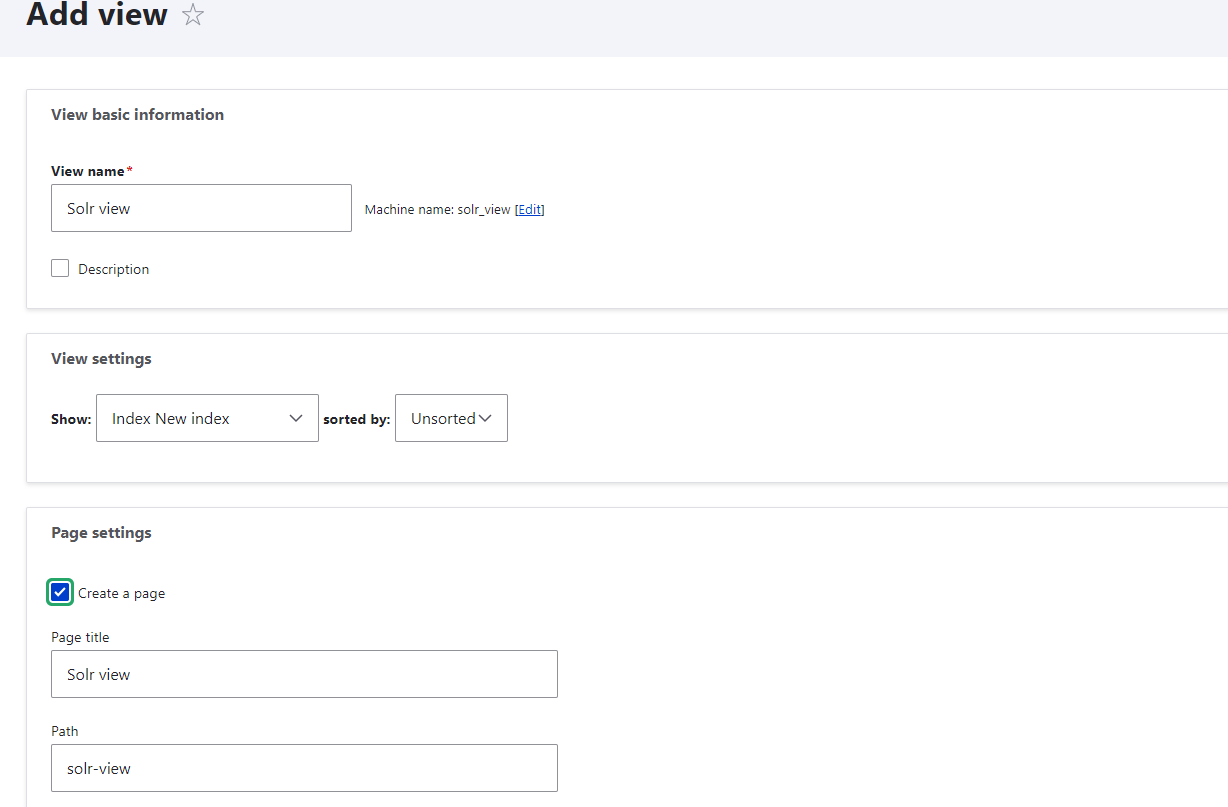
View Name: Enter view name.
Show: Select the show related to your index name.
Page setting: create a page
2. Click on the Save and edit button.
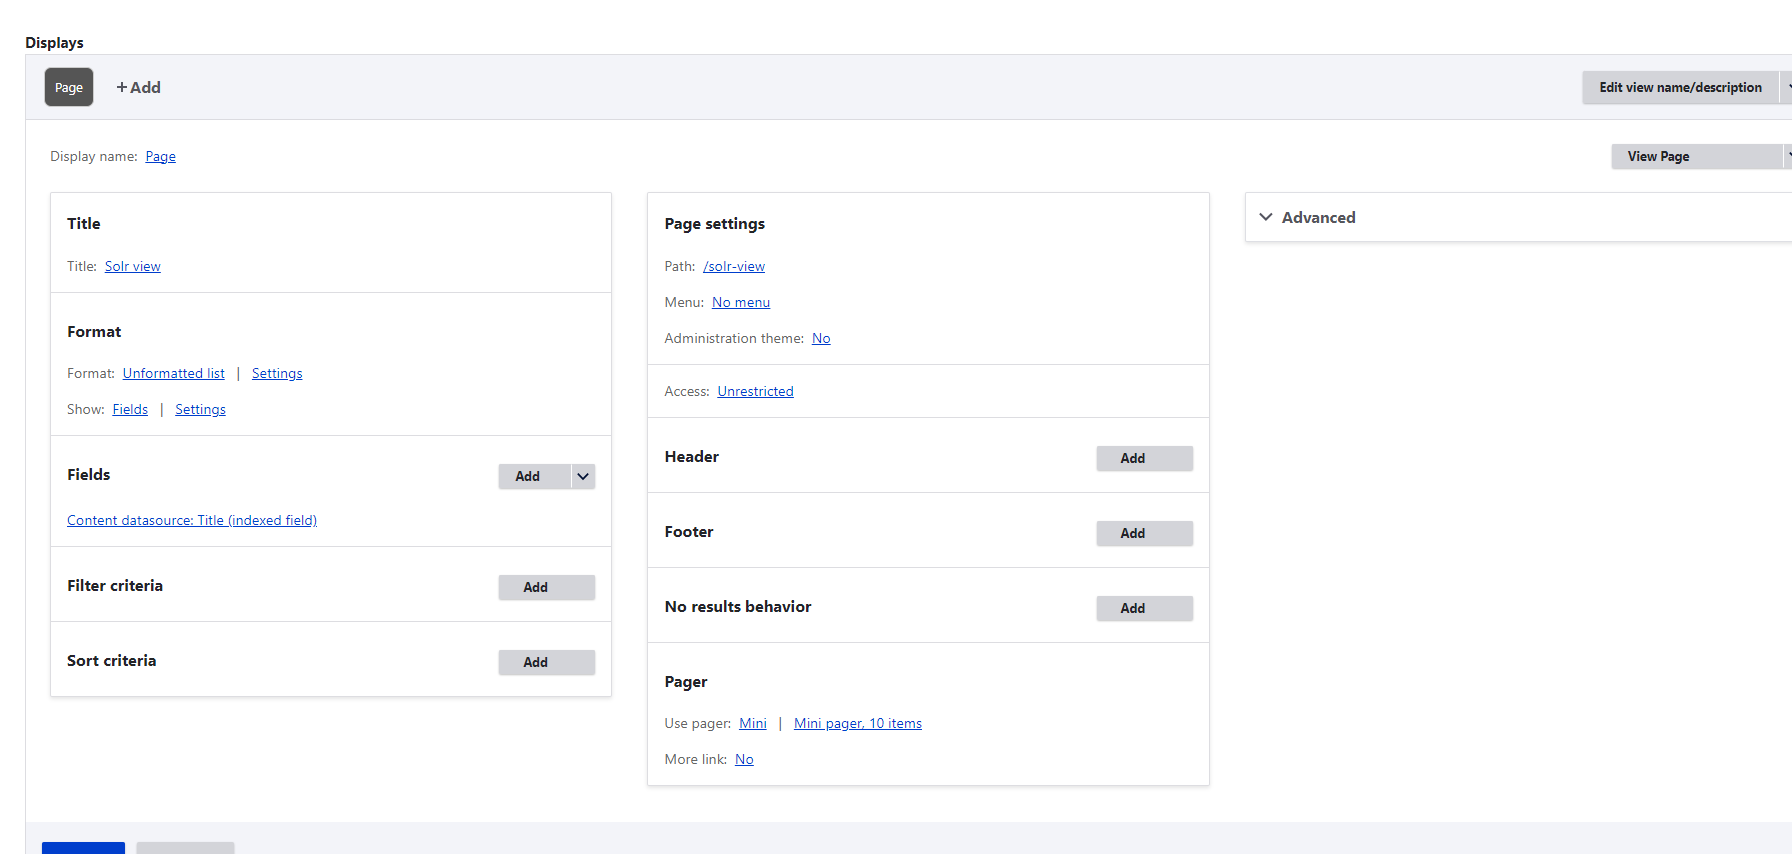
3. After this you need to add fields regarding your requirement And add Filter on one field.
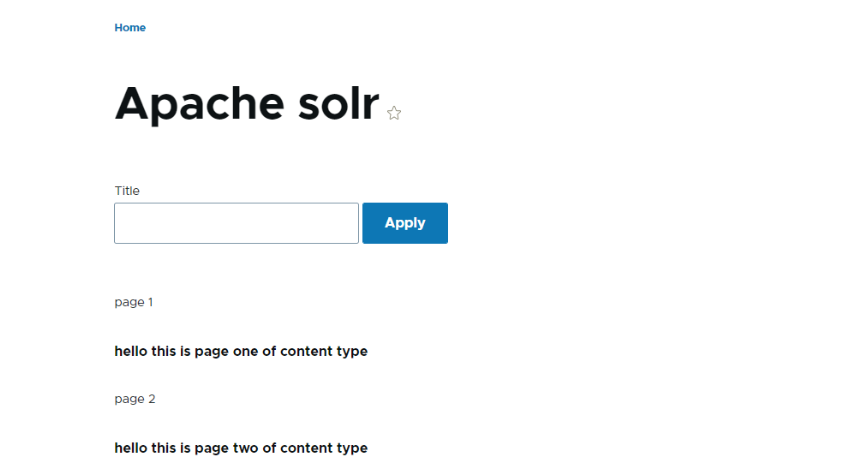
4. Go to your created view page. you can see your Search API Solr on your website.
Let’s Wrap It Up!
In Conclusion, we can say that a few steps are needed to be completed to integrate Apache Solr with Drupal. First, you need to install the Drupal modules. Similarly, install Apache Solr and integrate both by following the above steps.
To manage your website, you can also enlist the aid of LN Webworks, a Drupal agency. Through Drupal, we are assisting small and medium-sized businesses in creating a seamless experience.Reach out to us right away to go over the specifics of your project.
Share This Post:
Author Information

LN Webworks
Your Drupal Solution PartnerLN Webworks have championed open-source technologies for nearly a decade, bringing advanced engineering capabilities and agile practices to some of the biggest names across media, entertainment, education, travel, hospitality, telecommunications and other industries.
Talk With Certified Experts Of LN Webworks!
Related Articles
April 30, 2024
Implementation Of Open Social Distribution On A Local Server In Drupal
April 26, 2024


