Subscribe To Our NewsLetter
Share This Post:
Setting up WordPress with Docker is a powerful way to streamline your web development process. Docker allows you to create isolated environments, ensuring that your WordPress site runs consistently across different systems.
Whether you're a developer looking to standardize your workflow or a beginner eager to explore WordPress, using Docker can simplify the installation and management of your site. In this guide, we’ll walk you through the step-by-step process of setting up WordPress with Docker, enabling you to get your site up and running quickly and efficiently.
Docker
Docker is open-source software that helps us to run the container or which provides us with a containerized platform. In simple, Docker is very famous and widely used.
WordPress
WordPress is an open-source content management system (CMS) that makes it easy to create and manage a website. It is the most popular CMS in the world. Millions of business owners, bloggers, and publishers use WordPress daily to maintain their online presence.
Step-By-Step Guide To Installing WordPress With Docker
Step 1: Install Docker
First, ensure you have Docker installed on your machine. You can download and install Docker from the official Docker website.
Step 2: Create a Project Directory
Create a directory for your WordPress project:
mkdir wordpress-docker cd wordpress-docker
"OR"
You simply make a folder where you want to create your WordPress project.
Step 3
After that Open this folder with Visual Studio Code(VS Code)
Step 4
Create a docker-compose.yml in your project directory.
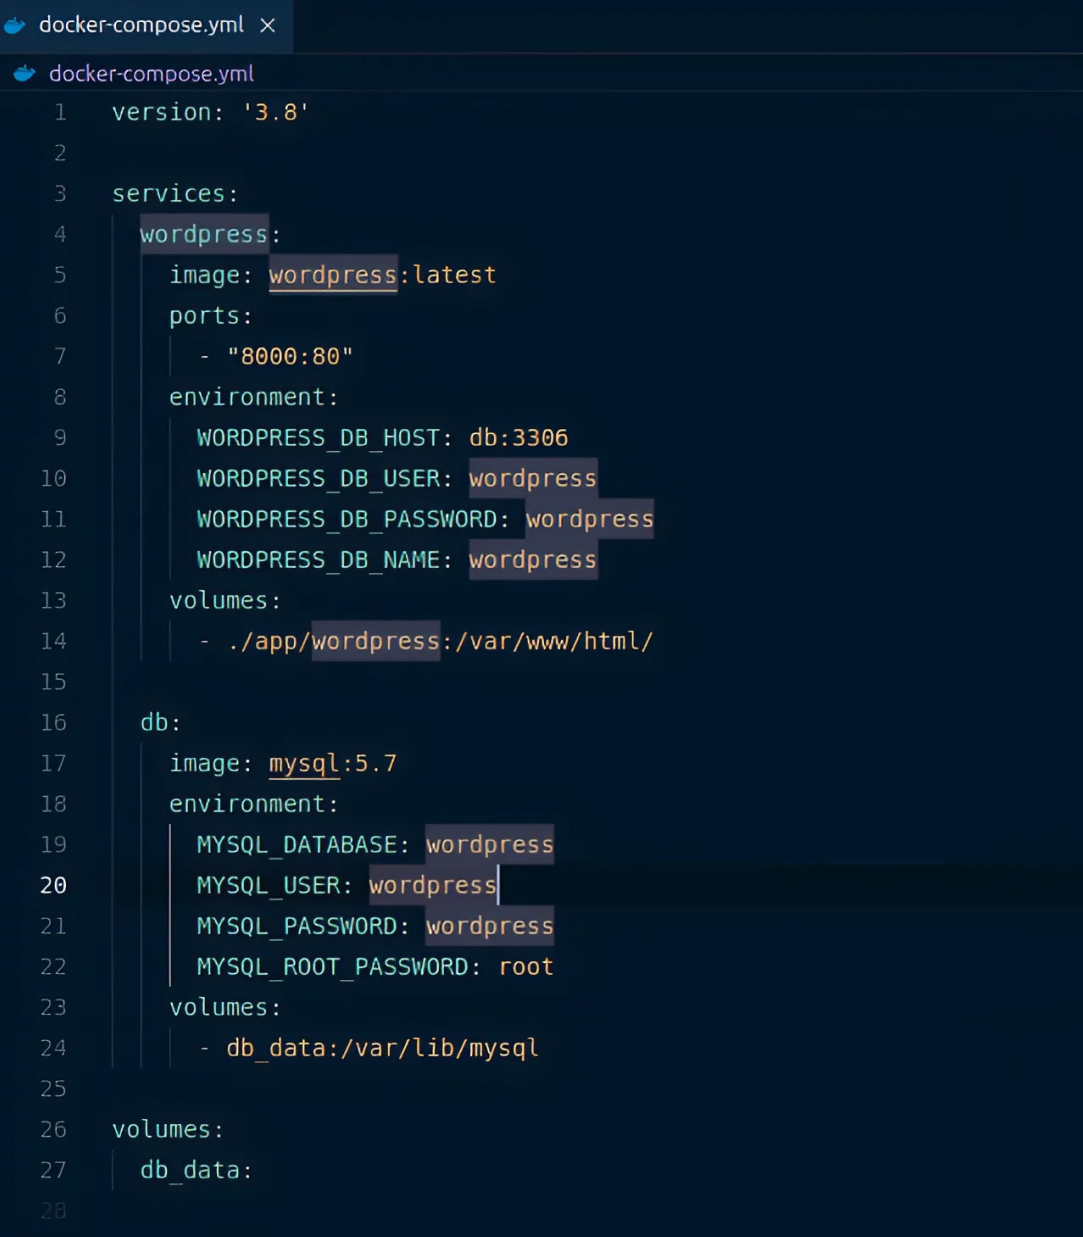
#This specifies the version of the Docker Compose file format to be used.
version: '3.8'
# Use the latest WordPress image from Docker Hub
image: wordpress:latest
# Map port 8000 on the host to port 80 in the container
ports:
- "8000:80"
# Specify the database host and port
WORDPRESS_DB_HOST: db:3306
# Database username
WORDPRESS_DB_USER: wordpress
# Database password
WORDPRESS_DB_PASSWORD: wordpress
# Database name
WORDPRESS_DB_NAME: wordpress
# Map the wp-content directory on the host to the container
volumes:
- ./wp-content:/var/www/html/wp-content
# Use MySQL 5.7 image from Docker Hub
image: mysql:5.7
# Name of the database to be created
MYSQL_DATABASE: wordpress
# MySQL user
MYSQL_USER: wordpress
# MySQL user password
MYSQL_PASSWORD: wordpress
# MySQL root password
MYSQL_ROOT_PASSWORD: root
# Persist MySQL data to a Docker volume
volumes:
- db_data:/var/lib/mysql
Step 5
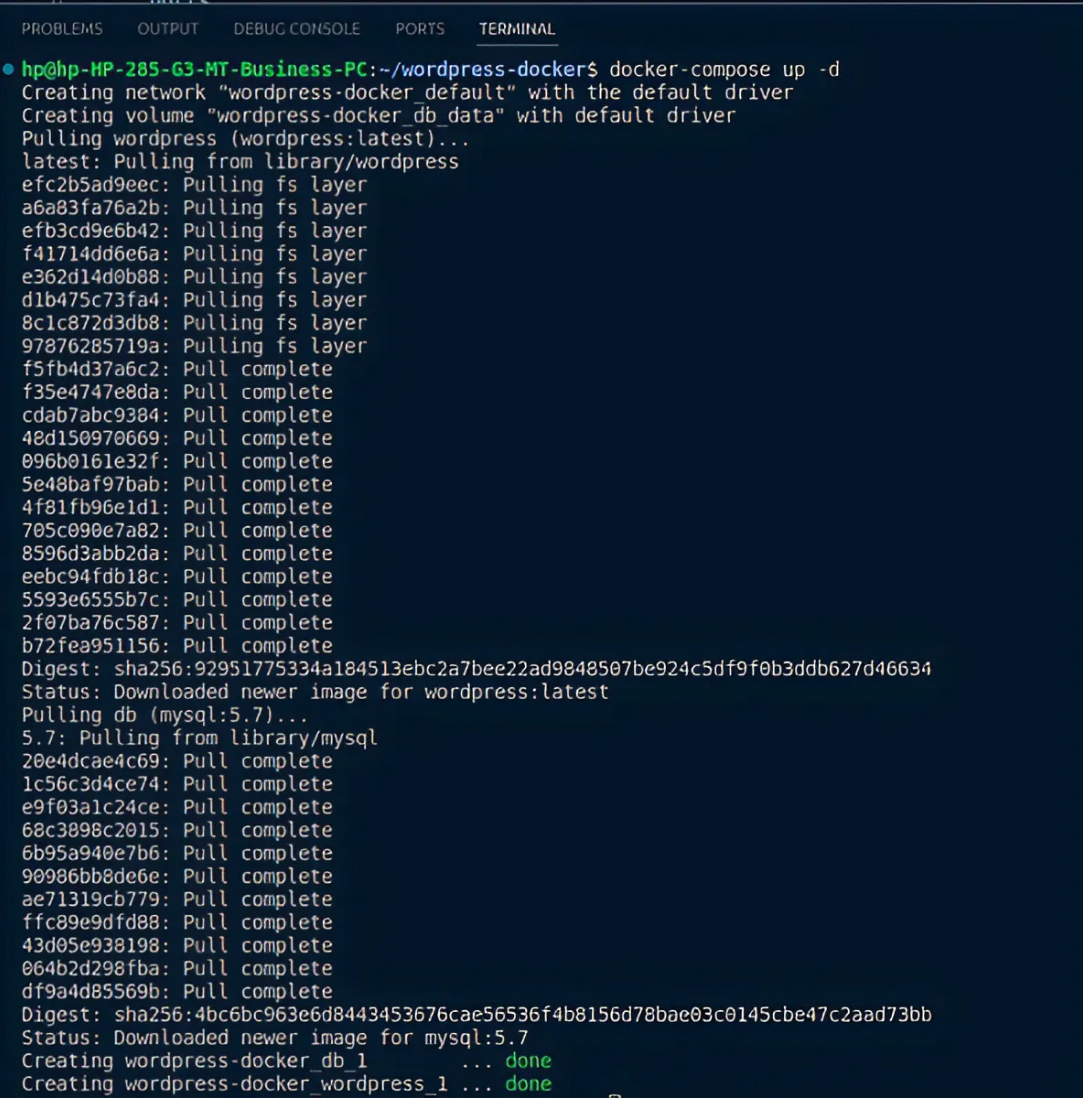
To start the services defined in the docker-compose.yml file, run the following command in the terminal:
docker-compose up -d
Step 6
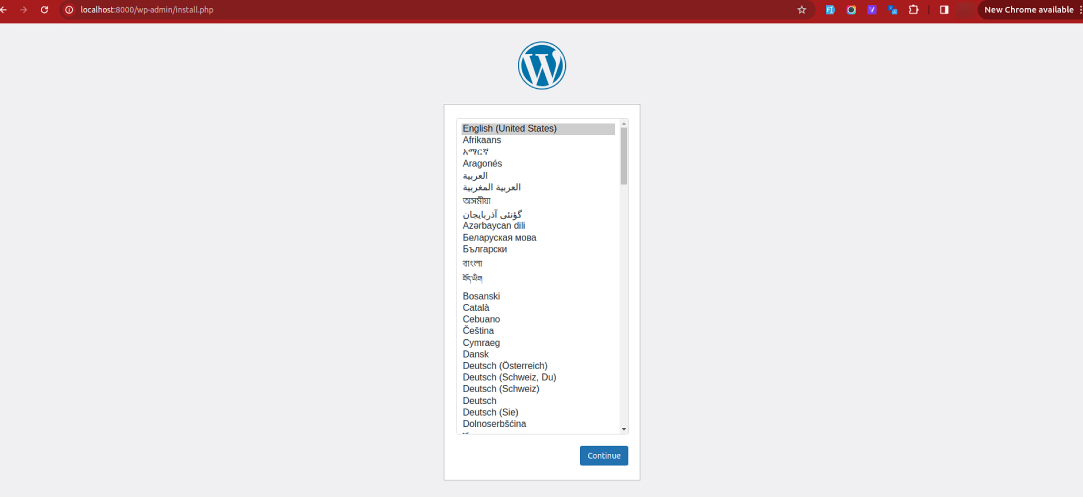
After That, You Need to check on:-
http://localhost:8000
Step 7
After that Click on continue.
Step 8
Now fill in the details and click on Install Wordpress.
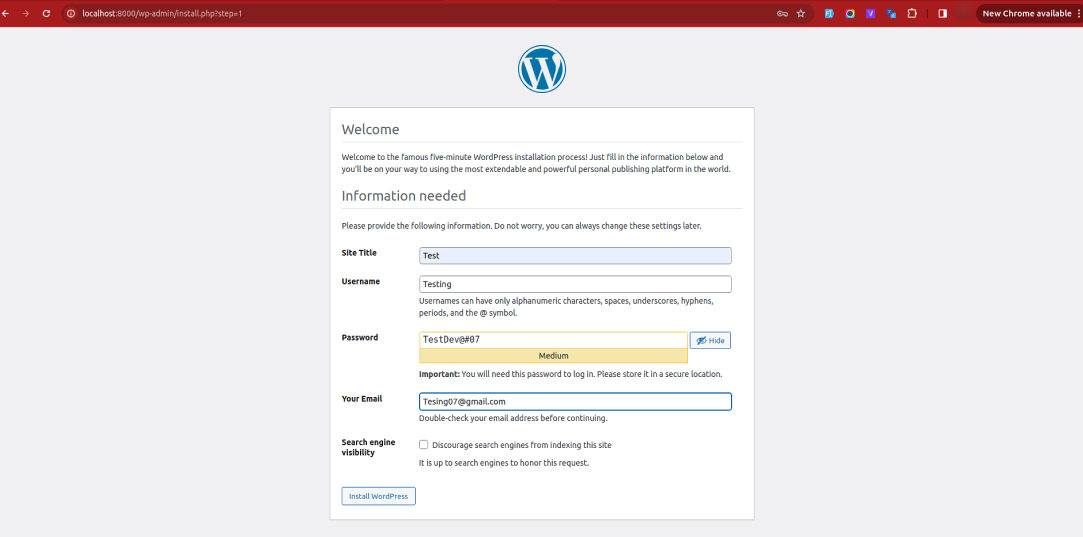
Your WordPress Setup is successfully done.

Let’s Wrap It Up!
By following these steps, you've successfully set up WordPress using Docker, streamlining your development process with a consistent and efficient environment. Docker's ability to containerize your WordPress installation ensures that your setup is both portable and easily reproducible.
At LN Webworks, we’re committed to your success. Our expert team is here to provide personalized assistance. Contact us today to schedule your free consultation!
Share This Post:
Talk With Certified Experts Of LN Webworks!
Related Articles
July 9, 2024
How To Create Custom Git Commands With Aliases
June 24, 2024

